Sunday, 22 July 2012
PowerShell Execution Policy Commands
Set-ExecutionPolicy Restricted
Set-ExecutionPolicy AllSigned
Set-ExecutionPolicy Unrestricted
Set-ExecutionPolicy RemoteSigned
When any of the above command is run, following registry value changes:
HKLM\Software\Microsoft\PowerShell\1\ShellIds\Microsoft.PowerShell
Restricted
AllSigned
RemoteSigned
Unrestricted
RemoteSigned
Unrestricted
PowerShell Execution Policy
Following are the execution policies available in PowerShell
1. Restricted: PowerShell Execution policy is set to Restricted by default which means powershell scripts are not allowed for execution
2. All Signed: In this policy, only the signed powershell scripts are allowed for execution
3. RemoteSigned: In this policy, all powershell unsigned scripts present on local harddrive are allowed for execution but scripts are executed remotely from a network share or from internet are not allowed for executed,
remote scripts need to be signed for execution.
4. UnRestricted: In this policy all powershell scripts whether they are signed or unsigned are allowed for execution.
Friday, 20 July 2012
Start Service on Remote Computer - PowerShell
Following script will start the service "Browser"
$sb={
$service=get-service browser
if ($Service.status -eq "Stopped") {
write-Host "Starting service on $env:Computername" -foreground Green
$service | Start-service -PassThru
}
else {
$service
}
}
To run the above script type following command:
invoke-command $sb -comp remotecomputername
Result will be as follows:

Connect to Remote Machine using Powershell
To connect to remote machine using PowerShell. WinRM (Windows Remote Management) service needs to be in started mode on the remote computer.
Then, run the following command on remote computer: WinRM quickconfig
Follow the steps displayed in command prompt to receive requests and remote management. Now the remote machine is ready to be accessed using powershell from any other computer.
Type following command in Powershell to access the remote machine:
-> Enter-PSSession ComputerName
Get Status of Service on a Remote Machine - PowerShell Command
Get-Service ServiceName -computername remotecompname | Select-object -Property Name,Status, MachineName
Get all services which are running - PowerShell Command
Get-Service | Where {$_.Status -eq "running"}
What are Cmdlets
Cmdlets are specialized commands in the PowerShell environment that implement specific functions. These are the native commands in the PowerShell stack. Cmdlets follow a <verb>-<noun> naming pattern, such as Get-ChildItem
Display Message with Timer - VBScript
Following Script displays a message for 60seconds OR until user clicks OK.
a = "WSS 4.1 is already installed, Exiting WSS 5.0 Installation"
Set sh = CreateObject("WScript.Shell")
sh.Popup a,60, ""
Thursday, 19 July 2012

Wednesday, 18 July 2012
Check if Registry Exists - VBScript
Const HKEY_CURRENT_USER = &H80000002
strComputer = "."
Set objRegistry = GetObject("winmgmts:\\" & strComputer & "\root\default:StdRegProv")
strKeyPath = "SOFTWARE\Wow6432Node\Microsoft\Windows\CurrentVersion\Uninstall\{039694F1-2108-4B3E-8575-85C245210F94}"
strValueName = "DisplayName"
objRegistry.GetStringValue HKEY_CURRENT_USER,strKeyPath,strValueName,StrValue
If IsNull(StrValue) Then
Wscript.Echo "The registry key does not exist."
Else
Wscript.Echo "The registry key exists."
End If
Bring a Process to Front for User Focus - AutoIT Script
Compile the following script using AutoIT and pass the process to be brought to front as commandline
For Example: BringToFront.exe "Caculator"
AutoIt Version: 3.3.0.0
Author: myName
Script Function:
Bring Window to front.
#ce ----------------------------------------------------------------------------
AutoItSetOption("TrayIconHide", 1)
If $CmdLine[0] > 0 Then
$WinTitle = $CmdLIne[1]
Else
Exit 1
EndIf
If $CmdLine[0] > 1 Then
$WinText = $CmdLIne[2]
Else
$WinText = ""
EndIf
WinWait($WinTitle, $WinText, 60)
If WinExists($WinTitle, $WinText) Then
WinActivate($WinTitle, $WinText)
EndIf
Remove Trailing Backslash - VBScript
On Error Resume Next
Dim strNewValue, Path, slash
Path = InputBox("Enter Folder Path", "Please Enter", "")
slash = Len(DatabasePath1)-1
strNewValue = mid(Path, 1, slash)
msgbox StrNewValue
Tuesday, 17 July 2012
Citrix License Administration Console
When you launch the shortcut "License Administration Console" you will receive following Error.

It looks like its a but, However, tTo access Citrix License Administration Console, type the following URL in your browser
http://loca

It looks like its a but, However, tTo access Citrix License Administration Console, type the following URL in your browser
http://loca
Monday, 16 July 2012
Get RAM Size - VBSCript
Following script displays the RAM present on a system
Option Explicit
Dim objWMIService, objComputer, colComputer
Dim strLogonUser, strComputer
strComputer = "."
Set objWMIService = GetObject("winmgmts:"& "{impersonationLevel=impersonate}!\\"& strComputer & "\root\cimv2")
Set colComputer = objWMIService.ExecQuery("Select * from Win32_ComputerSystem")
For Each objComputer in colComputer
Wscript.Echo "System Name: " & objComputer.Name & vbCr & "Total RAM " & objComputer.TotalPhysicalMemory/(1024*1024)
Next
WScript.Quit
Reboot System - VBScript
set sh=createobject("wscript.shell")
set fso=createobject("scripting.filesystemobject")
Dim a
a=MsgBox("Do you want to Reboot your system",4,"Application Name")
If a=6 Then
MsgBox "yes was clicked"
sh.Run "shutdown -r"
End if
Application Packaging Videos
Converting EXE to MSI using AdminStudio Repackager
http://youtu.be/Dbx9jRSIWwA
http://youtu.be/Dbx9jRSIWwA
Get Files in a Folder - VBScript
Following script displays all the files present in a folder
Change the folder name in oFolder
Dim oFSO, oFile, oFolder
Set oFSO = CreateObject("Scripting.FileSystemObject")
Set oFolder = oFSO.GetFolder("C:\Sample")
For Each oFile in oFolder.Files
MsgBox oFile.Name
Next
Change the folder name in oFolder
Dim oFSO, oFile, oFolder
Set oFSO = CreateObject("Scripting.FileSystemObject")
Set oFolder = oFSO.GetFolder("C:\Sample")
For Each oFile in oFolder.Files
MsgBox oFile.Name
Next
Remove Excel Addin - VBScript
Following VBScript can be used to delete Excel Addin
Change AddIn_path to the Excel Addin file that needs to be removed
Set objArg = WScript.Arguments
AddIn_path = objArg(0)
AddIn_path = "C:\Program Files\FO PROD\SalesXL.xla"
strKeyPath = ""
oReg.EnumKey HKEY_USERS, strKeyPath, arrSubKeys
For Each subkey In arrSubKeys
'msgbox subkey
strKeyPath = subkey & "\SOFTWARE\Microsoft\Office\11.0\Excel\Options"
oReg.EnumValues HKEY_USERS, strKeyPath,_
arrValueNames, arrValueTypes
X = """" & AddIn_path & """"
For i=0 To UBound(arrValueNames)
oReg.GetStringValue HKEY_USERS,strKeyPath,arrValueNames(i),strValue
If (left(arrValueNames(i), 4) = "OPEN") Then
If strValue = x Then
oReg.DeleteValue HKEY_USERS,strKeyPath,arrValueNames(i)
'msgbox strKeyPath & "\" & arrValueNames(i)
End If
End If
Next
Next
Set Excel Addin - VBScript
Following script can be used to set Excel Addin
Chabge Addin_Path value to the path of XLA file of Excel Addin that needs to be set
On Error resume next
Const HKEY_CURRENT_USER = &H80000001
const REG_SZ = 1
const REG_EXPAND_SZ = 2
const REG_BINARY = 3
const REG_DWORD = 4
const REG_MULTI_SZ = 7
Set objArg = WScript.Arguments
AddIn_path = objArg(0)
AddIn_path = "C:\Program Files\FO PROD\salesXL.xla"
strComputer = "."
Set oReg=GetObject("winmgmts:{impersonationLevel=impersonate}!\\" &_
strComputer & "\root\default:StdRegProv")
strKeyPath = "SOFTWARE\Microsoft\Office\11.0\Excel\Options"
oReg.Createkey HKEY_CURRENT_USER,strKeyPath
oReg.SetStringValue HKEY_CURRENT_USER,strKeyPath,"EXAddin",1
oReg.EnumValues HKEY_CURRENT_USER, strKeyPath,_
arrValueNames, arrValueTypes
n = 1
X = """" & AddIn_path & """"
For i=0 To UBound(arrValueNames)
oReg.GetStringValue HKEY_CURRENT_USER,strKeyPath,arrValueNames(i),strValue
If (left(arrValueNames(i), 4) = "OPEN") Then
n = n +1
If strValue = x Then
'msgbox strValue
n = 0
Exit For
End If
End If
Next
If n <> 0 Then
n = n -1
If n = 0 Then
oReg.SetStringValue HKEY_CURRENT_USER,strKeyPath,"OPEN",x
Else
oReg.SetStringValue HKEY_CURRENT_USER,strKeyPath,"OPEN" & n,x
End If
End If
Sunday, 15 July 2012
SUBINACL command to set File permission
Following is the command used to set Full Control permission to Users group
SUBINACL.EXE /file "C:\Program Files\VNDesktop\settings.xml" /grant=Users=F
SUBINACL.EXE /file "C:\Program Files\VNDesktop\settings.xml" /grant=Users=F
Command to Register EXE
Command to register an executable
MyFile.exe /REGSERVER
Command to Unregister an executable
MyFile.exe /UNREGSERVER
MyFile.exe /REGSERVER
Command to Unregister an executable
MyFile.exe /UNREGSERVER
Command to register DLL using MSIEXEC
The following example shows how you can use the msiexec /y command:
msiexec /y my_file.dll
/y : Calls the system API DllRegisterServer to self-register modules passed on the command line.
msiexec /z my_file.dll
/z : Calls the system API DllUnRegisterServer to unregister modules passed on the command line.
INSTALLLEVEL Property in MSI
Below are the list of features present in MSI and their Levels are highlighted


We can disable a feature by changing its Level value higher than INSTALLLEVEL value.
In the following snapshot HPIO feature level is set to 110 and hence it is disabled.

Wednesday, 11 July 2012
Application Packaging Interview Questions - Miscellaneous
- How to set a shortcut to install only on Windows7
- How to set a component to install only if .Net Framework 4.0 full is installed
- How to set a component to install only if operating system is 64bit ?
- If there are two MSIs, a.msi and b.msi , how to package the application such that a.msi installs on WinXP and b.msi doesnt install, but in Windows7 both MSIs install
- What is the use of Advertizing a shortcut?
- How to set a condition in MSI to install only if desktop screen resolution is above 1280x720
- How to set a custom action inside MSI to run CA after completing installation of MSI?
- How to create a package, to check for microsoft office apps, and if they are running prompt a message to user to close them, wait for 1min, if user doesn't close office apps. Force close them and install MSI. After installation is complete, display a message a to user that Office apps can be used now and the message shouldn't be closed until user clicks OK button
AdminStudio 11.5 Announced- New Features
Adding New Support for the Microsoft Private Cloud, App-V 5.0 and Windows 8 Migrations, and App Portal Bundle
For more details, Please visit http://www.flexerasoftware.com/company/newscenter/pressreleases/press-releases_14259.htm
Monday, 9 July 2012
Windows 8 - Copy Files
Windows 8 hasbetter copy paste functions that allow multiple file copy pasting and better memory usage.


Windows 8 - Start Button like Windows 7

Microsoft is trying its best to disable classic startbutton which was present till Windows7.


Windows 8 - Enable Hyper-V Client
Goto Add/Remove Programs and open "Turn Windows Features On or Off"
Select Hyper-V and its submenus and click OK to install HyperV related features

Once Installation is completed, HyperV related shortcuts will be visisble as shown below:

Select Hyper-V and its submenus and click OK to install HyperV related features

Once Installation is completed, HyperV related shortcuts will be visisble as shown below:

Sunday, 8 July 2012
AppV 5.0 Beta Server Installation
Configuring AppV 5.0 Beta Server Installation


Provide the Database Instance in the below screen

Provide Website name and Unique Port Number for Management Server Configuration in below screen

Provide Website name for and Port number for Publishing Server in below screen


Once installation is completed, Provide the URL along with Port Number to access AppV Server as shown below

AppV 5.0 Beta Server Installation - Requirements
Following are the requirements to install AppV 5 Beta Server
- Microsoft Windows .NET Framework 4 Extended Version
- Windows Web Server 2008 with only the following features: Common HTTP Features (static content and default document), Application Development (ASP.NET, .NET Extensibility, ISAPI Extensions and ISAPI Filters), Security (Windows Authentication, Request Filtering)
- Microsoft .NET Framework 3.5 (For PowerShell support.)
- Download and install KB253623.( Its a printing mistake in guide, hence the actual KB is KB2533623)
- The Microsoft Visual C++ 2008 Redistributable Package (x64)(http://www.microsoft.com/download/en/details.aspx?id=15336)
- You must install both versions of the Microsoft .NET Framework (Microsoft .NET 3.5 and Microsoft .NET 4). Microsoft .NET 3.5 is required with Microsoft .NET 4 to enable and support the App-V 5.0 Beta Server PowerShell cmdlets.
Note: Installing the App-V 5.0 Beta server is not supported for the following scenarios:
- Installing on a domain controller.
- Installing on a server running previous versions of App-V server components.
- Installing on Server Core.
Friday, 6 July 2012
Append Entry in Hosts file - VBScript
Following script will append the entry present in sample.txt file to hosts file.
Following script needs sample.txt and hosts file to be present in the same directory where script file is locatied. Please change TargetFile and Input paths according to requirement.
************************************************************
Const ForReading = 1, ForWriting = 2, ForAppending = 8
Dim TargetFile,objWshShell,objFSO, Input, ProgramFiles, WinDir
Dim objTextFile, Target
Set objWshShell = CreateObject("WScript.Shell")
Set objFSO = CreateObject("Scripting.FileSystemObject")
ProgramFiles = ObjWshShell.ExpandEnvironmentStrings("%ProgramFiles%")
WinDir = ObjWshShell.ExpandEnvironmentStrings("%WinDir%")
CDir = objFSO.GetParentFolderName(Wscript.ScriptFullName)
Set Targetfile = objFSO.GetFile(CDir & "\hosts")
Set Input = objFSO.GetFile(CDir & "\Sample.txt")
Set objTextFile = objFSO.OpenTextFile (Input, ForReading)
Set Target = CreateObject("Scripting.FileSystemObject")
Set TargetFile = Target.OpenTextFile (TargetFile, ForAppending, True)
Do Until objTextFile.AtEndOfStream
Input = objTextFile.ReadLine
TargetFile.WriteLine(Input)
Loop
TargetFile.Close
ObjTextFile.Close
***************************************************************
-> Create sample.txt file with following content for example and save it in same location where vbscript file is present.
# 10.10.10.10 www.sample.com
-> Place hosts file in the same location where VBscript is present.
-> Run the VBscript, above line will be appended to hosts file.
Running powershell scripts on Windows
Why do you get weird error messages when you try to run a script? That’s easy. The security settings built into Windows PowerShell include something called the “execution policy;” the execution policy determines how (or if) PowerShell runs scripts. By default, PowerShell’s execution policy is set to Restricted; that means that scripts - including those you write yourself - won’t run. Period.
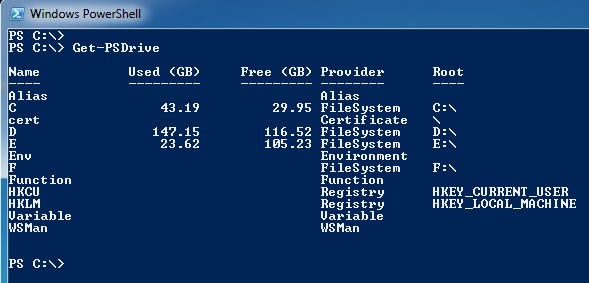
Note. You can verify the settings for your execution policy by typing the following at the PowerShell command prompt and then pressing ENTER:
Get-ExecutionPolicy
suppose you want to configure PowerShell to run - without question - any scripts that you write yourself, but to run scripts downloaded from the Internet only if those scripts have been signed by a trusted publisher. In that case, use this command to set your execution policy to RemoteSigned:
Set-ExecutionPolicy RemoteSigned
Alternatively, you can set the execution policy to AllSigned (all scripts, including those you write yourself, must be signed by a trusted publisher) or Unrestricted (all scripts will run, regardless of where they come from and whether or not they’ve been signed).
Regardless of your location within the file system. It doesn’t matter if you’re in C:\Scripts; you still need to type the following:
C:\Scripts\Sample.ps1
Convert Legacy AppV Package to AppV 5.0 format
Following Powershell command should be used to convert AppV packages developed using AppV 4.6SP1 or less TO AppV 5.0 format.
ConvertFrom-LegacyAppvPackage -source "{legacy pkgs}" -target "{vnext pkgs}"
where {legacy pkgs} and {v.Next pkgs} represent the path to the associated packages.
Sftmime and App-V 5.0 BetaPowerShell cmdlets
The following table displays the sftmime functions available with previous versions of App-V 5.0 Beta and the App-V 5.0 Beta PowerShell equivalent:

To install the App-V 5.0 BetaPowerShell Cmdlets
1. To use the Server App-V PowerShell Cmdlets open an elevated PowerShell cmd prompt and import the modules by running one of the following commands:
2. To load the Server App-V client cmdlets, type:
PS C:\> Import-Module AppVClient
To load the Server App-V server cmdlets, type:
PS C:\> Import-Module AppVServer
To load the Server App-V sequencer cmdlets, type:
PS C:\> Import-Module AppVSequencer
To load the Server App-V package converter cmdlets, type:
PS C:\> Import-Module AppVConverter
AppV 5.0 Client GUI
AppV Client Interface in version 5.0 has changed to resemble Windows 8 tiles

Available AppV packages are visible as displayed below, we can find if its a offline package or streamed and also has the option to reset/repair user state.

The location where AppV package content is stored is C:\ProgramData\AppV\[PackageID]

Command to Hide/Unhide a File
Command to Hide: Attrib +h "PathofFile"
Command to Unhide: Attrib -h "PathofFile"
Thursday, 5 July 2012
AppV 5.0 Package Output
Sequencer output in AppV 5.0 has changed a lot, following are no more available
- No OSDs
- No sft file
- No Icons file
New output contains:
- .appv file
- .xml files ( DeploymentConfig.xml and UserConfig.xml)
- .msi file (report.xml)
Packages developed using AppV versions below 5 are to be converted to AppV 5 format, ( there is no native support of AppV 4.6 or below sequenced packages in AppV 5)
Screenshot of sample AppV 5 package output

When you use the sequencer to create a new virtual application, the following list displays the files that are created and comprise the App-V 5.0 Beta package:
- .MSI – this Windows Installer (.msi) file is created by the sequencer and is used to install the virtual package on target computers.
- Report.xml - the sequencer saves all issues, warnings, and errors that were discovered during sequencing and displays the information after the package has been created. You can us this report for diagnosing and troubleshooting.
- .appv file - the virtual application.
- Deployment configuration file - the deployment configuration file determines how the virtual application will be deployed to target computers.
- User configuration file - the user configuration file determines how the virtual application will run on target computers.
AppV 5.0 - Change in Variables
Addressing system locations using CSIDL format has changed in App 5.0. Microsoft made it simpler and similar to Installshield/Wise variables.

AppV 5.0 - No WinXP Support
Microsoft has removed WinXP as TargetOS in AppV 5, hence if AppV support for XP has to be there in any organization environment, they have to stick to AppV version 4.6SP1
Screenshot of TargetOSes in AppV 5

Screenshot of TargetOSes in AppV 5

Wednesday, 4 July 2012
InstallAnyWhere response file generation Commands
To generate response file and perform installation/uninstallation for InstallAnyWhere setups, use following commands:
For creation of Response File: Setup.exe -r C:\FolderName\FileName.properties
Silent Installation using Response file
Installation Command using response file: Setup.exe -i silent -f FileName.PropertiesSilent Uninstallation using response file
.Properties file can be found in the same location where uninstallation EXE is present, which can be used for silent uninstallation as follows:
C:\Program Files\AppName\UninstallFolder\Uninstall.exe -i silent -f UninstallFileName.Properties
InstallAnyWhere Silent installation Commands
To install/uninstall installanywhere setup with default options, use following silent switches:
For Installation: Setup.exe -i silent
For Uninstallation: C:\Program Files\AppName\UninstallFolder\Uninstall.exe -i silent
Tuesday, 3 July 2012
Get MSI property value using VBScript
Following script displays the INSTALLDIR property value present inside MSI
Dim objWshShell, str
set objWshShell = CreateObject("WScript.Shell")
str = Session.Property("INSTALLDIR")
MsgBox(str)
set objWshShell = nothing
MSI Property Precedence
The installer sets properties using the following order of precedence. A property value in this list can override a value that comes after it and be overridden by a value coming before it in the list.
1. Properties specified by the operating environment.
2. Public properties set on the command line.
3. Public properties listed by the AdminProperties property set during an administrative installation.
4. Public or private properties set during the application of a transform.
5. Public or private property that set by authoring the Property table of the .MSI file.
Monday, 2 July 2012
Differences between WindowsXP and Windows7
WindowsXP: User profiles are stored in C:\Documents and Settings
Windows7: User profiles are stored in C:\Users
WindowsXP: All Users Profile is stored in C:\Documents and Settings\All Users location
Windows7: All Users profile is stored in C:\ProgramData location
WindowsXP: User Account Control is absent
Windows7: User Account Control is present to avoid unwanted changes to System locations
WindowsXP: No Session Zero isolation
Windows7: Session Zero isolation present. Please refer to following URL for more information on Session Zero isolation
http://windowsteamblog.com/windows/b/developers/archive/2009/10/01/session-0-isolation.aspx
Friday, 29 June 2012
Application Packaging Interview Questions - Scripting
Following are questions related to Scripting in Application Packaging
VBScripting
- What is On Error Resume Next
- What is Option Explicit
- What are different objects available in VBScripting?
- What object is used to perform operations on Files/Folders?
WiseScripting
- How to get environment variable value into a variable?
- How to add/edit/remove registries?
- function to delete Files?
- How to check if OS is 32bit or 64bit ?
- can we execute VBscript inside Wisescript?
- how to pass values from VBScript to WiseScript?
- How to execute MSI using WiseScript?
- How to check if MSI installation using Wisescript is successful or failure?
- How to display a message while MSI installation is happening using WiseScript?
- How to check if a process is running using WiseScript?
- How to check if file/directory exists using WiseScript?
- How to check if a file is in use?
- How to pause wisescript execution for sometime?
- How to set the name of output file generated using WiseScript?
- How to copy files from one location to another location using WiseScript?
- What is the different between INST and '.'(DOT)
- How to stop execution of WiseScript?
- How to read Registry values using WiseScript?
- How to get current Date and Time using WiseScript?
- Can a wisescript runs another wisescript?
- How to install files on the system using WiseScript?
- How to install files if doesn't exist using WiseScript?
Search this blog for Answers on various queries
Subscribe to:
Comments (Atom)